
North Shore
North Shore
Lake Forest, Il
Lake Bluff, Il
Mettawa, Il
Highland Park, Il
Winnetka, Il
Glencoe, Il
Kenilworth, Il
Wilmette, Il
Great Lakes, Il
Fort Sheridan, Il
Lincolnshire, Il
Vernon Hills, Il
Deerfield, Il
Bannockburn, Il
Libertyville, Il
Riverwoods, Il
Mundelein, Il
Highwood, Il
Northbrook, Il
Northfield, Il
Glenview, Il
Wheeling, Il
Buffalo Grove, Il
Chicago, Il
Union Ridge
Norwood Park
Schorsch Village
Belmont Heights
Hanson Park
Peterson Park
Rogers Park
Portage Park
Kilbourn Park
Jefferson Park
Mayfair
Ravenswood
Lincoln Square
Avondale
Roscoe Village
Andersonville
Lakewood
Uptown
Edgewater
Edgebrook
Forest Glen
Sauganash
Wildwood
Northern Chicago
Suburbs
Evanston, Il
Park Ridge, Il
Skokie, Il
Niles, Il
Lincolnwood, Il
Arlington Heights, Il
Prospect Heights, Il
Mount Prospect, Il
Morton Grove, Il
Oak Park, Il
Des Plaines, Il
River Forest, Il
Harwood Heights, Il
Norridge, Il
Elmwood Park, Il
River Grove, Il
Melrose Park, Il
Schiller Park, Il
Franklin Park, Il
Rosemont, Il
North Chicago, Il
Waukegan, Il
Downtown
Lincoln Park
Wrigleyville
Irving Park
Lakeview
Buena Park
Bucktown
Logan Square
Wicker Park
West Town
East Village
Ukrainian Village
River North
Old Town
Gold Coast
Near North
Streeterville
Near East Side
Millenium Park
Loop
West Loop
South Loop
Goose Island
River West
60004 60005 60006 60010 60011 60015 60016 60017
60018 60019 60022 60025 60026 60035 60037 60040
60043 60044 60045 60047 60048 60052 60053 60054
60055 60056 60057 60058 60059 60060 60061 60062
60063 60064 60065 60068 60069 60070 60076 60077
60079 60085 60086 60087 60088 60089 60090 60091
60092 60093 60131 60132 60160 60161 60162 60171
60176 60201 60202 60203 60204 60208 60209 60301
60302 60304 60305 60398 60601 60602 60603 60604
60605 60606 60607 60610 60611 60613 60614 60618
60622 60625 60626 60630 60631 60634 60639 60640
60641 60642 60645 60646 60647 60654 60656 60657
Tuckpointing Side Wall

Tuckpointing In Progress – Close Up
Here is an example of tuckpointing work in progress. The faded, worn out bricks on the right are being re-mortared in order to give them a sharper cut. Notice that the tuckpointed bricks on the left have a depth and cut between them whereas the bricks on the right just have a dull, faded look. The mortar is first applied evenly on the brick lines and then cut to give it depth.
Tuckpointing In Progress – Full View
As the tuckpointing work continues we can see the sharper contrast between the tuckpointed bricks and the non-tuckpointed bricks. As we spread the mortar out it is cut to give the bricks and mortar a sharp, straight look.Tuckpointing Red Brick Wall

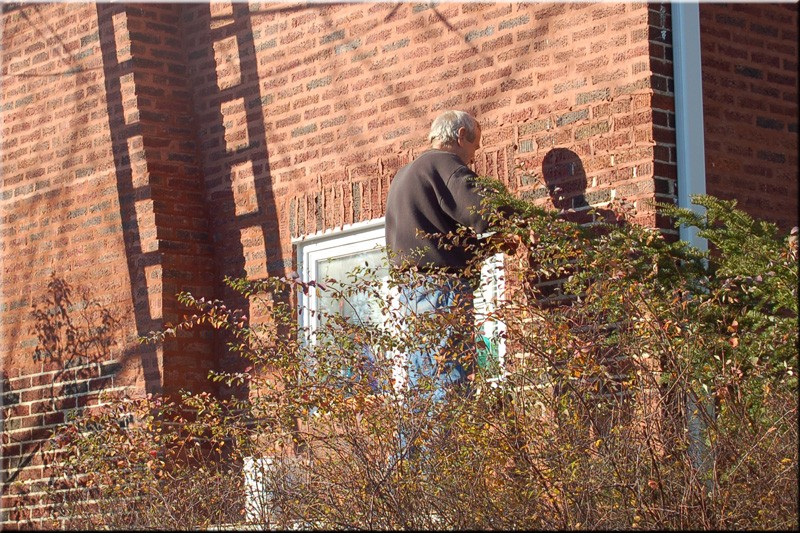
Tuckpointing In Progress
Here we have another example of tuckpointing in progress. This wall was run-down and needed touch-ups in several areas to give it a clean, healthy look. Using scaffolding and ladders we can tuckpoint even hard-to-reach or elevated places. A properly completed tuckpointing project will restore this wall to its full integrity.
Tuckpointing Completed
We see that the bricks on this wall have clean mortar and crisp cut lines thanks to the tuckpointing. Tuckpointing jobs can either be contained to small areas or cover larger walls. We can even tuckpoint isolated spots on walls to match the original bricks to give walls a clean and consistent look.Tuckpointing Orange Bricks

Tuckpointing In Progress
This tuckpointing project is nearing completion. We can see the smooth white film from the tuckpointing on the lower courses, and the top four courses still have the old grout and are about to be tuckpointed. The mortar will be smoothed and cut down after additional mortar has been applied. This will complete the tuckpointing process and gives the bricks their “cut” look. The white film on the bricks is from residual mortar and dust that accumulates during the tuckpointing process, however it is eventually washed out by rain or direct water application.
Tuckpointing Completed
This is the finished brick wall after tuckpointing. Note the straight even mortar lines and the clean cuts of the bricks. This wall will look good and maintain this structural integrity for several more years thanks to the tuckpointing that it received.Tuckpointing Stucco Wall

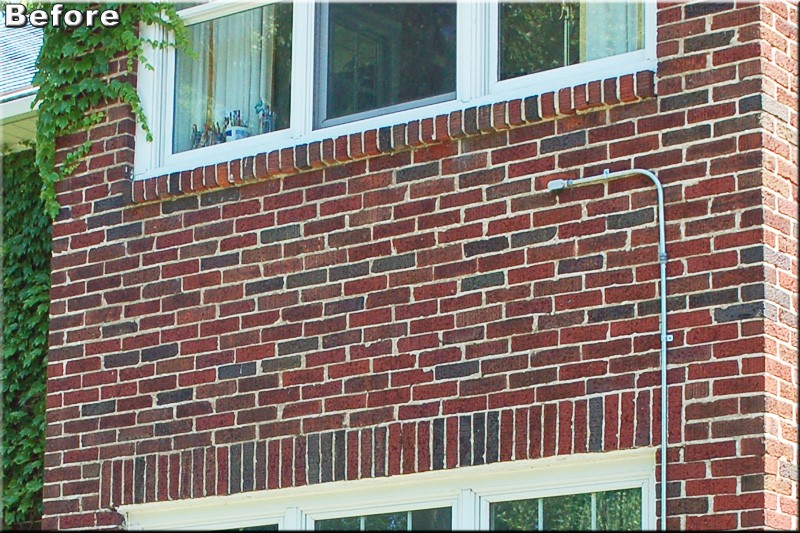
Before Tuckpointing
This doorway has a nice brick decorative trim around it however the mortar is old and has started to chip, crack and fade. Not only are the bricks in danger of falling off but it also looks a little beaten up. Tuckpointing these bricks will strengthen the bonds holding them together and it will also give this doorway a fresh new look.
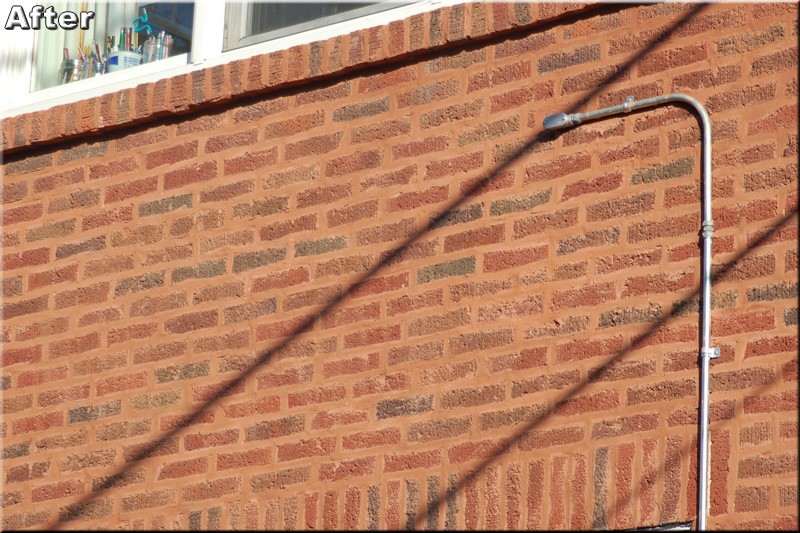
After Tuckpointing
After the tuckpointing we can see the bricks look cleaner and the mortar around them has filled in the cracks and chipped areas from before. The new mortar has a rich color and gives this door a very clean, solid, and authentic look. Additionally the new mortar from the tuckpointing will ensure that this doorway will look good and be strong for years to come.
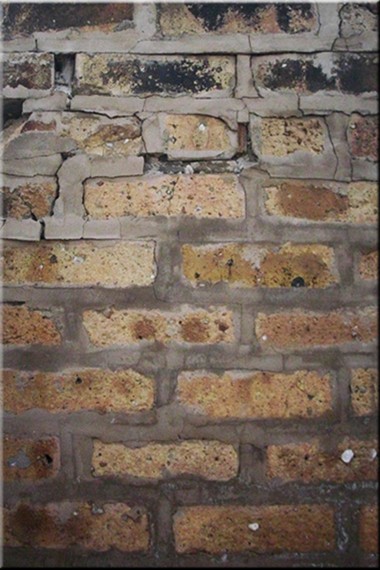
Before Tuckpointing Close Up
This is a close up of the brick pattern from before the tuckpointing. From very close up we can see all the little chips and cracks that are weakening these bricks and making them look battered and worn. We see that a lot of the old mortar is starting to break away from the bricks and has a generally sloppy and worn out look.
After Tuckpointing Close Up
We’ve gotten rid of the old mortar and filled in the cracks in these bricks with new mortar during the tuckpointing process. The new mortar has replaced the old and we can see that now the bricks are held together with smooth and solid bonds. The new brick wall is solid and is sure to look good for years to come.
Tuckpointing In Progress
Here is a shot of these bricks receiving the tuckpointing. The new red mortar is being applied between the bricks to give the entire area a smoother and cleaner look. The window on the right has already been partially tuckpointed and we can already see a difference between the top and the bottom. The tuckpointing work will really make these bricks stand out.Tuckpointing House

Tuckpointing in Progress – Front Of House
Tuckpointing work can even be done around an entire house. Over time bricks and mortar crumble and fade and might need a touch-up. Through the tuckpointing process we are able to repair and renew the crumbled mortar and match its color, texture, and cut to the rest of the house. Our experienced crews can even tuckpoint hard to reach places and can complete any tuckpointing job safely, expertly, and quickly.
Tuckpointing In Progress – Side of House
Tuckpointing in progress on the side of the same house. Sometimes entire walls need to be tuckpointed and that means we need to bring in ladders and scaffolding. This wall has some discoloration and grime built up along the bottom and right side where it hasn’t been tuckpointed yet. The top left has already received the tuckpointing application and we can see its lighter, more uniform color and texture.Tuckpointing Cracked Wall

Before Tuckpointing
Here we see a cracked and chipped brick wall. While most of the bricks in this wall remain relatively intact the mortar has completely come out in some spots and needs to be re-applied. This wall not only looks run-down but it is structurally weakened due to the cracks and holes. In addition to just repairing the bricks, tuckpointing this wall will help fill in the cracks which will improve both this wall’s aesthetics and structural integrity.
After Tuckpointing
The broken bricks have been removed and replaced and the holes and cracks have been filled in with mortar to make the brick wall look new and intact. The mortar was also cut when the wall received the tuckpointing to give the bricks and mortar a clean, crisp look. Though there is still a bit of residue on the bricks it will wash off easily and the tuckpointed wall will look like new. Additionally, thanks to the tuckpointing the wall will remain structurally sound for longer now that its cracks and weaknesses have been removed.Tuckpointing Before and After 1

Tuckpointing Before and After
Here is another example of a brick wall before and after tuckpointing. The left side of the wall has uneven mortar that is starting to chip and crumble and is unevenly distributed. The right side of the wall has been recently tuckpointed as evidence by the smooth, white mortar and the straight edges that it makes along the bricks. While the bricks were also ground down to make them smoother it was mainly the tuckpointing that gave the bricks their straight, smooth look.Tuckpointing Before and After 2
Before Tuckpointing
Bricks and mortar before grinding, repair, and tuckpointing. The mortar here was worn out, chipped, and dirty. While the bricks themselves also needed and received work the tuckpointing process was what cleaned up and straightened out the mortar. We can see the accumulated dirt and grime on the mortar as well as the uneven texture of the bricks and mortar that needs to be grinded off and smoothed over for the tuckpointing to be done.
After Tuckpointing
These bricks and the surrounding mortar joints have been repaired and have gone through the tuckpointing process. While these bricks were also repaired, what we did during the tuckpointing process was to grind away and smooth out the chipped, dirty, and rough mortar and replaced it instead with fresh, clean mortar. We also “colored” in the brick edges during the tuckpointing work to create a cleaner cut line between the bricks and the surrounding mortar.Tuckpointing Before and After 3

Before Tuckpointing
The bricks and mortar on this wall are clearly starting to crumble. We see cracks and uneven lines and we can tell that these bricks have not been serviced in quite a while. This is a perfect situation where tuckpointing the bricks can help them look new again. The tuckpointing job will even out the mortar imperfections and give these brick wall smooth, clean lines.
After Tuckpointing
These are how our bricks look after performing the tuckpointing. We see that the mortar is now smooth and even and is flush with the brick faces. We can also see that the imperfections, chips, cracks, gouges, and rough patches of mortar have also been eradicated. The tuckpointing work make this wall look very neat and clean.Chimney Tuckpointing 1
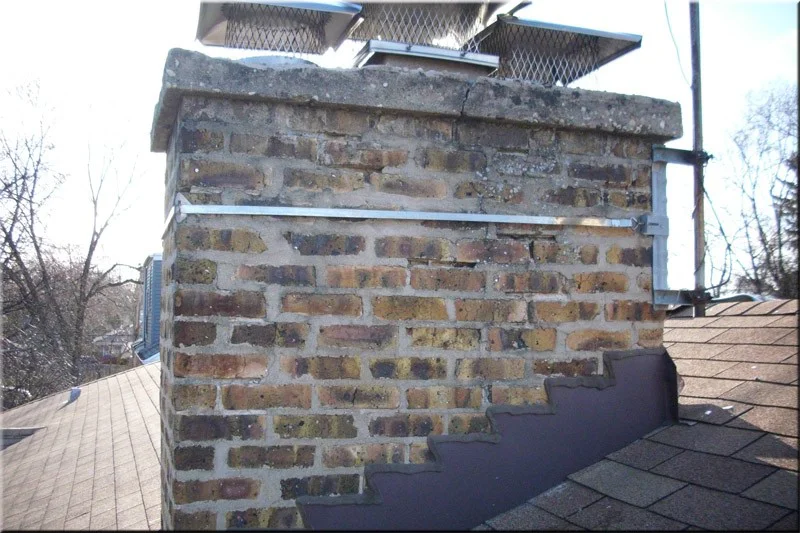
Before Tuckpointing
We can even tuckpoint the brick on chimneys. While chimney repairs usually require more work than just tuckpointing, tuckpointing does help repair the broken or cracked mortar on chimneys. This chimney has a work out cap and needs to have its mortar renewed. Tuckpointing will help strengthen the structural integrity of this chimney and will also give the bricks and mortar a clean, fresh look.
After Tuckpointing
We can see the repairs on this chimney have included work on the cap and the brick mortar. While this mortar wasn’t cut in quite the same way as other brick walls it was still used to reinforce the joints around the bricks. The partial tuckpointing gave the chimney a more consistent, even look and will help strengthen it for the future.Chimney Tuckpointing 2

Before Tuckpointing